Objectives:
1. Create a network with half of the class and make sure it works correctly.
2. Connect that network to a router and then configure the router to connect the network to the other network in the classroom.
3. Check to see if the connection to the computers on the other network is working correctly.
Equipment list: Dr. Gx’s handout, desktop computers, switches, a router, and patch cables.
Notes and Observations:
I’ve never dealt with a networking project like this so almost all of this felt knew to me. It wasn’t really hard, it was more of a learning curve issue for me. There was a few issues that I ran into during the exercise.
When we starting to look into how to manually change the IP address, we got onto websites that told us that we had to use the command prompt with certain commands. It turned out that it was not helpful at all and the correct way was actually pretty simple and fast.
We found out that to apply the manually set settings you have to close the window for the NIC. At first I didn’t close this window and for a few moments we couldn’t think of why my computer was the only one that wasn’t working with the network.
When they were configuring the router, I tried to follow what they were doing and I got the general idea of what they were doing but I would need to do it myself to have a better handle on it.
Question 1. What is the differences between the missions of the Internet Assigned Numbers Authority (IANA) and the American Registry for Internet Numbers (ARIN)?
IANA coordinates the global use of the Internet Protocol (IP) addressing systems and the Autonomous Systems Numbers (ASN) that route internet traffic. Their main role regarding IP addresses is to allocate “pools” of unallocated IP addresses to the Regional Internet Registrys (RIR).
ARIN is the RIR that covers the United States, Canada, andmany Caribbean and North Atlantic islands. It manages and distributes internet number resources such as IP addresses and ASNs within its region.
Question 2. What are some reasons to update TCP/IP to IPv6 and what are some reasons to continue to use IPv4?
Some reasons to update to IPv6 are that it can support much more IP addresses, is more secure, and eliminates some connectivity issues that exists with IPv4.
Some reasons to continue using IPv4 is that there is many devices that would not be able to use IPv6, the concern of getting devices that are on IPv4 to communicate to devices using IPv6, and devices that don’t connect straight to the internet with TCP/IP and send or receive only small packet headers could be badly effected by IPv6.
Lab exercise: Set up a network, hook up the network to a router, and see if we can communicate with the other network in the classroom.
Step 1. My group of classmates was “Group C”. Our IP address was based on 192.168.10 . We hooked up all the computers to a switch.
Step 2. On each of the computers we had to configure the IP addresses manually. To do this on Windows 10:
1. Go to the Control Panel.
2. Go to Network and Internet.
3. Go to Network and Sharing Center.
4. Go to Change Adapter Settings.
5. Right click on the icon that’s for your computers NIC and select Properties.
6. Look at the list and select Internet Protocol Version 4 (TCP/IP) and click on Properties.
7. Click on Use the following IP address and fill out the network settings.
8. When completed, click on OK and then close the window for the NIC.
My computers IP address was set to 192.168.10.2
The Subnet Mask filled itself automatically to 255.255.255.0
The default gateway was set to 192.168.10.254
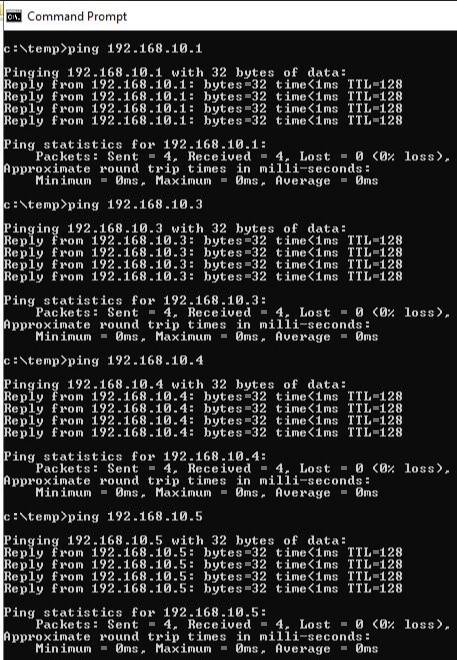
Step 3. We had to check to see if all the computers were connected to the network correctly. We used the Command Prompt and used ping with the IP addresses that had been set for each computer on the network. When we all got ping results from the other computers, we then knew that the network was working correctly.
Step 4. Now we needed to hook up the switch to the switch to the router and configure the router to use the IP address for our network, which was 192.168.10.254 , and for the other networks IP address. We simply plugged an ethernet cord to one of the inputs of the router. We had a separate computer that had the software needed (hyperterminal) to talk to the router and was plugged into the console port of the router. Using this separate computer another student and Dr. Gx configured the router. The software looks and functions similarly to the command prompt on Windows 10.
Step 5. Now that the router was configured, we had to make sure that our computers and network was working correctly with it. We used the ping command again but used the IP address 192.168.10.254 . All of our computers got a ping response.

Step 6. Test the connectivity between the to networks.
I didn’t do this step. By the time I remembered that I had this last step, the networks were already being taken down. I think some of the other people in my group pinged some of the computers on the other network and got a response.
Question 3. What protocol is used to automatically (dynamically) assign IP addresses to machines?
Dynamic Host Configuration Protocol (DHCP)
Diagrams, flowcharts, and figures:

References:
https://www.link-labs.com/blog/why-ipv6-is-important-for-internet-of-things
Conclusions:
This was definitely an interesting class today. A long time ago I had dealt with a router that had to be configured but the scenario and network was simpler than what we set up in class. I’d like to get a chance to use the hyperterminal software and configure the router myself some time.
